

Keyshot提升真实感的渲染小技巧
如你所知,Keyshot是一个特别神奇的应用软件,但是,就像Photoshop一样,如果你不知道怎么使用它,那么再优秀的工具在你手中也什么都是了。这里我就告诉你一些制作优秀效果图的技巧以及如何使用这个神奇软件。
从现实中获取灵感
首先,你必须要知道,你的工作是什么,你的兴趣点,你的工作方式,以及你想制作什么风格的效果等等。是一辆汽车,电器,花或者鞋什么的?不同的设计产品可能有不同的渲染方法。看看我们周围的环境,在现实世界中,哪怕是一面镜子,一块镀铬的金属也不会有100%完全的反射。镜子是玻璃后面加了一层特殊的涂层。玻璃瓶子通常都会有凹凸(你可以近距离看看周围的玻璃瓶子)。同样的道理,在电影中你可能会说“这是电脑特技制作的”。原因是制作的太完美了,太精确了。现实世界不是参数化构成的,一个好的图形设计师应该清楚得知道,现实世界是充满了不确定性、随机性的。摄影师、图形设计师、修图师是为数不多能发现真实物体的随机变换性才构成了我们现实世界的独特美感。即使是一模一样的两个物体,我们也希望能发现他们的一丝丝不同。

场景设置
在桌子上创建一个简单的场景——一些水果、一个盘子、一瓶水、一只烟、几只鞋子、一些信封报纸、或者在香水瓶旁放一瓶墨水,一些金色的或者镀铬的物体。总之放一些你可能会在以后工作中用到物体类型。现在你的场景已经搭建好了。
灯光布置
下面我们来布置灯光,先简单的布一盏聚光灯(像你办公桌上的阅读台灯或者皮克斯的标志上的灯光一样)目的是让他在黑暗中突出来。试试在你的场景中只使用一盏聚光灯,从前后左右不同方向打光。
图片
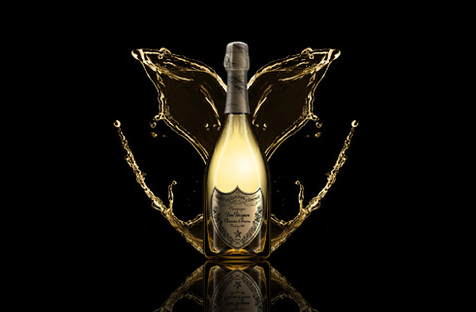
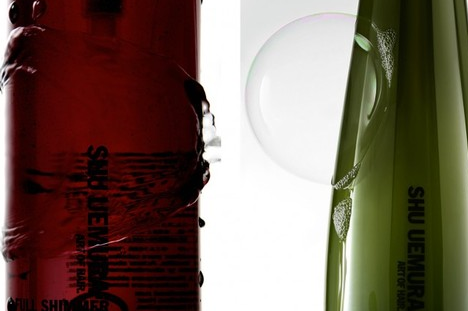
尝试从这些角度拍一张简单的图片(用手机或者准专业的相机都可以)。当然,你也可以使用镜子反射聚光灯的光来营造玻璃瓶美妙的反射效果。仔细观察场景你会发现,玻璃和金色物体以及镀铬物体一样有很多反光,拍下一张场景的照片。
我们为什么做这些呢?因为Keyshot就像是一台数码相机,我们打开Keyshot,重塑一个一模一样的场景——相同的物体和模型。
设置环境
用一样HDRI动态贴图,制作HDRI,可以在Photoshop中,在黑色背景中央加一个镜头炫光,然后保存为32为HDRI格式图像。把图像加入Keyshot环境库中,双击添加到场景中。尝试实现房间里单盏聚光灯的真实环境相似的效果(如果能制作你房间里一样的HDRI光照效果就更好了)
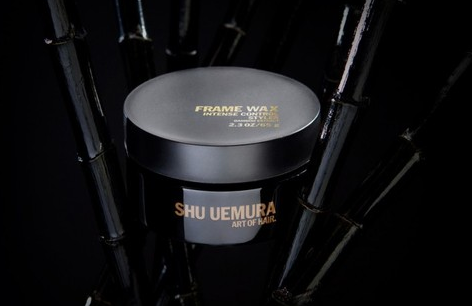
例如,金色物体都是一样的。我找了一大堆口红包装来研究它的特性。口红瓶子,如你所知,上面并不是真正的金子,它是塑料喷金色漆的,我拍一张口红瓶子的照片,然后在Keyshot中照此制作一个金色漆的材质,然后一直使用它,当然它的效果会随HDRI的变化而不同,我们可以做光线调整,但金色漆的效果都是不错的。
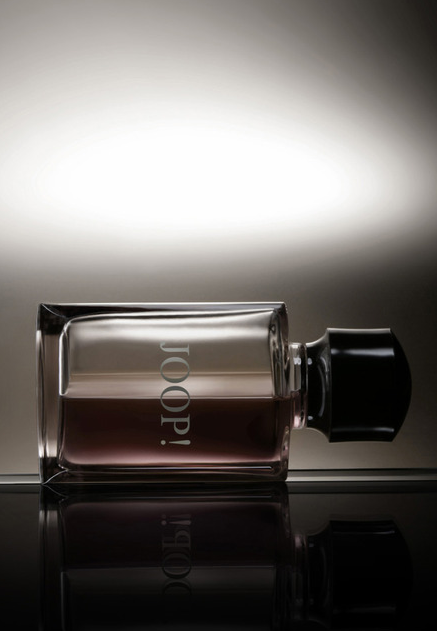
Keyshot提供的才是很精确,但是尽量少地使用它——正如一辆红色的轿车永远不可能是100%的红色。拍一张照片导入Photoshop中分析它的颜色,你会惊奇地发现,绝大部分情况下,红色的车是棕色的。这就意味着,我们可以把Keyshot的材质作为基础来调整出需要的材质,同时加入您自己对材质的理解。
所以,当一个客户需要渲染一辆汽车时,你应该准备好你需要的材质,这样就比你一切从0开始效率高多了。
Keyshot8大高效率工作技巧
每一个材质都应该有一定的反射,那怕是汽车轮胎,即使是一个并不明显的反射,也会使你的场景看起来更加真实。
在建立场景前先参考现实世界,可以上网查看相似物品的实物照片。
创建自己的材质库,可以节约制作的时间,提升工作效率。
对摄影技术有一定的理解,Keyshot就像一台数码相机,只有理解摄影的原理,才能得到更好的渲染效果。
用Photoshop创建自己的HDRI贴图。
多临摹网上的优秀图形设计站上的作品,试着重现别人的优秀渲染效果。
多尝试变换高反光物体如镀铬金属等高反射物体的HDRI贴图,为高反射物体选择正确的HDRI贴图,
每种材质都有一定凹凸,即使是镀铬金属,玻璃,车漆或者镜子。那怕只有0.000000000001%的凹凸,也会让你的场景更加真实。

最后一点建议
Do reality, not what you think reality is,就像口红瓶子一样,他不是真正的金子,它是塑料金色漆,以后你的工作中也一样,应特别注意这一点,这样Keyshot才能渲染出好的效果。当然了,就像真实的相机一样,有时我们也需要Photoshop来对照片进行后期处理。
翻译如有不妥,以下是英语原文:
Step 1
Keyshot is a wonderful program as you know, but… it’s like Photoshop – if you don’t know what to do, the fantastic tool would be nothing. Here are some tips to create very nices images and understand how to enjoy this terrific program.
Step 2
Look at the real world
First, consider this. What is your work, your passion, your way, the style of image you want to do? Automotive, engineering, flowers, shoes? …Your answer will show you the direction to go with your renderings. LOOK AT REALITY. In the real world, even a mirror or chrome will NEVER have 100% reflection. A mirror is created with a special overlay under glass. A glass bottle ALWAYS has bumps. (Look close at a real glass bottle.) It’s the same reason with movies, why you might say, “It’s done in 3D.” The result is too perfect, too mathematical. Reality is not mathematical, there are a thousand mistakes and variations in reality. A good graphic designers knows that. Photographers, graphic designers and retouchers are some of the few who understand the beauty and the complexity of our reality. We always try to copy it and we tend to see more than others – it’s a fantastic mess of mistakes. Now, to approach this situation and have a better point of view on the topic, let’s capture our scene.
Step 3
The set up
Create a simple scene on a table – Some fruits? A plate, a glass of water, a cigarette, some shoes, some letters, papers and ink near a bottle of perfume, some gold part and chrome parts? Choose items you will use in the future for your job. Now, your composition, your scene is done.
The lighting
Next, let’s do the lighting. Take a simple spotlight (the one you use for reading a book in an office table for example… yes, like the one in the PIXAR logo :) ) The purpose is to be alone in the dark, with a single spot lighting your scene. Try to be alone in your room, and use ONLY a single spotlight. Try lighting your scene from the front, from the side, and from the back.
The photo
Take a simple photo (with your mobile phone, with a semi-professionnal camera, all are ok for this) of all these angles. Of course, you can use a mirror to reflect the light of your spotlight (to create an amazing light reflection in the glass of water for example…) Play with the scene. Look the glass. It will have many reactions, like the gold parts of your scene, or chrome parts. Capture this in the photo.
Step 4
Why are we doing this? We are doing this because KEYSHOT IS A DIGITAL CAMERA. Now, let’s get into KeyShot and re-create the same scene with the same objects and models.
Set Environment
Use a simple HDRI. To create a single spot HDRI, create an image in Photoshop – Black, with a lens flare in the middle and save it as 32 bits in .HDR format (radiance). Now, add this to your Environments library and double-click it to add to your scene in KeyShot. Try to create THE EXACT PHOTO you did with your single spotlight in your room. (Even better if you can create an HDRI of your room! Here is a good tutorial to create your own HDRI’s.)
Set Materials
Now, attribute materials. This is the trick to get really accurate images. You have to modify or create materials to be EXACTLY like the photo you did. You can create your own Materials in KeyShot. In this way you can begin to create your own material library with the materials you use the most. You have a greate example of reality to base it on – your photo. In the future, when you have to create a scene quickly, you’ll be able to just use your own gold. This speed up the process immensely!
For example, my gold is always the same. I stook a lipstick container and studied it. You know on a lipstick container, it’s not real gold. It’s plastic painted in gold. So I did a photo of the lipstick and I created a gold paint to be EXACTLY like my photo. So, when I use this material, I select “paint” as my base material in KeyShot. Now, I always use the same gold. Of course, it changes depending on which HDRI I use. There is a lot of lighting adjustment, but I know my gold paint is the best (for now.)
The materials provided with KeyShot are very accurate, but don’t forget this – a red car is never 100% red. Take a photo of a red car, go into Photoshop and analyze the color. You will be surprised. Most of the time a red car is seen by our eyes as brown in reality. That means KeyShot materials are good bases to work on, but it will never replace your own creative feeling.
So now, when a client is asks for a car render, you should have all your own materials ready and be able to work faster than if you had to create everything from scratch.
Step 5
8 Tips to be more Efficient in KeyShot
EVERY material has reflection in reality (even tires of cars.) Even if it’s not a bright reflection, this little detail will bring the reality to your scene that you expect.
SEE THE REALITY BEFORE CREATING A SCENE. Search Google for images, some examples, of what you are about to do.
CREATE YOUR OWN MATERIAL LIBRARY and save every materials you make. You will win time for your next render.
UNDERSTAND PHOTOGRAPHY because KeyShot is a digital camera. If you don’t understand photography, you won’t be able to do good renders. Try at home on objects with a spotlight as seen before… read some tips on Google, there is thousand of tutorials about Photography… it can give you ideas.
CREATE YOUR OWN HDRI with Photoshop. Try some tests with a white paintbrush on a black background and see the results. Hint: start with the ones in KeyShot!
LOOK THE ADVERTISING and try to re-create the same images seen on Digital professional websites.
BE ABLE TO GUESS what HDRI is used when you see a scene with a chrome or a reflective model (like a car.) Practice a lot of HDRI’s to know what to do when a client is asking for a quick result.
EVERY MATERIAL HAS BUMPS (even chrome, glass, carpaint and mirrors.) Even if it’s only 0.000000000001% bump, it will bring reality to your render.
Step 6
Last Bit of Advice
Do reality, not what you think reality is (I mean the exemple of the lipstick : it’s not real gold, it’s plastic painted in gold, so do the same for all what you will work on )Keyshot will bring you a photo. Of course, like a real camera, sometimes you will decide to enhance this photo on photoshop. It’s what I do most of the time to have this « advertising » feeling, but it’s because it’s my job ;-) So, practice in real before going on your laptop, look carefully the reality… this is the best I can tell… And I did 14 years of still life photography to be able to tell you all these things. ;-)
原作者:未知


哇,大妈不光渲染技术强连英语都这么6
大妈好厉害
大妈66666
茅塞顿开
大妈好厉害
给大妈打call